
Written by Lars Lund 17 Jan 2022 11:49
Hot chillis in January
Text and photo: Lars Lund
If you are not on the chilli trend, you are missing out. But it is easy to get started because chillis are not difficult to take care of. They do not get that many diseases. Lice is sometimes a problem, but that is easy to handle. The chilli seeds should be sown in the soil now. The sooner you do it, the quicker you will get the spring feeling – and that is a good feeling.
What makes the chilli so popular is for some people the experience of the pain the strong chillis can give when eating them. It is almost like swimming in winter. You feel a thrill and then you feel great (according to those who dare)! The chilli is a vitamin boost anyway. The fruit contains large doses of calcium and vitamin C – actually twice the amount of vitamin C compared to citrus fruits. The red chillis are the healthiest ones and they also contain beta-carotene. The dried ones are full of vitamin A.
What makes the chilli hot, is not the meaty part of the chilli nor is it the seeds, it is actually the part of the chilli that is called ‘placenta’ which is the white part that the seeds are attached to. If you want the mild part of the chilli, then you should remove the placenta. The end of the fruit is the least hot part.
Let the chilli survive
The chilli is a perennial plant, but most people forget this or maybe they are not aware that with some nurturing care the plant can bloom for years. If the plant is kept in the greenhouse all year around, it will eventually perish when the temperature gets below 12 degrees Celsius.
That would be a shame because there are many benefits of the chilli if it survives the winter. The fruits come earlier, and the plant will carry more fruits than the year before. Especially among the hot and slow-growing plants, the chilli has many benefits if it lasts at least one more season. It is quite simple to do it. In the middle of autumn, when the temperature drops, you choose the healthiest plants. If you make a frost-free area in your greenhouse, you can keep the chillis in that area. Otherwise, bring them inside the house in a sunny place without too much heat. Hereafter, you can remove the fruits that are left. If they are not ripe yet, you can let them ripen in the windowsill.
Now it is important to give the plant the best living conditions so it can start its dormancy and thereby, use as little energy as possible. To do this you can cut of all the branches that are left on the stem, so the branches only are 5 cm long. Although I have once before managed to keep one chilli with fruit alive because it looked decorative. But late in December the chilli will fade. Do not change the soil too often or water the plant too much.
When spring starts, the plant will begin to grow again. Now you can fertilise and irrigate as the plant grows. When the temperature starts rising again, you can put the chillis back in the greenhouse so they can get a lot of light.

Now is the time to sow your chillis, but remember to use grow light so they do not get spindly.
Photo: Grøn Kommunikation ©
How to take care of your chillis
Heat
Chillis do not like temperatures below 12 degrees and they need heat and a lot of light to bloom.
The strong ones are sown early
Some sorts ripen earlier than others, and the strongest ones later. Therefore, many people start to cultivate and sow the strong ones in December. They will need grow light. You can sow until March, or even in April if the plant is larger and stronger.
Soil and pots
The soil only needs to be a good drained potting soil.
Plants in pots needs more water than plants in beds. The bigger the pot, the better is the microclimate in the soil. Plastic containers hold the water the longest. Moreover, the plants will thrive just fine in a grow bag. When the plant produces fruit or starts to germinate, it should never need water.
Fertiliser
If the soil has been fertilised when you buy it, there is usually enough fertiliser for the plant the first six months. When they begin to flower, they should regularly be fertilised with fertiliser containing a high level of potassium.
Germination and nipping
The plants germinate within 10 days, but for some it take 5 weeks. It depends on the sort, and it takes between 4 and 6 months, from when you sow it, to when you can start harvesting. The germination needs a high humidity level, therefore, you should get a seed tray with a transparent lid. When it starts to germinate, you can remove the lid but make sure it does not dry out. The germinated seed can then be transplanted to a larger pot when the roots begin to be visible at the bottom. Place a plant stick to support the stem. When the plant is 30 cm., nip the shoots at the top to get it to branch off.
Pruning
After you have cut the shoots at the top, some will say you do not have to do anything else other than letting the plant grow. Although this is not the common method. Normally, you will remove at least two of the first flowers. This way you’ll get a higher yield. If the flowers fall of, the reason may be that they are not pollinated.

Before you know it, the chilli can be put in the greenhouse.
Photo: Grøn Kommunikation ©

If you get a lot of chillis, you can dry and save them for later.
Photo: Grøn Kommunikation ©

When it is time for its dormancy, you can cut it and place it somewhere cool.
Photo: Grøn Kommunikation ©
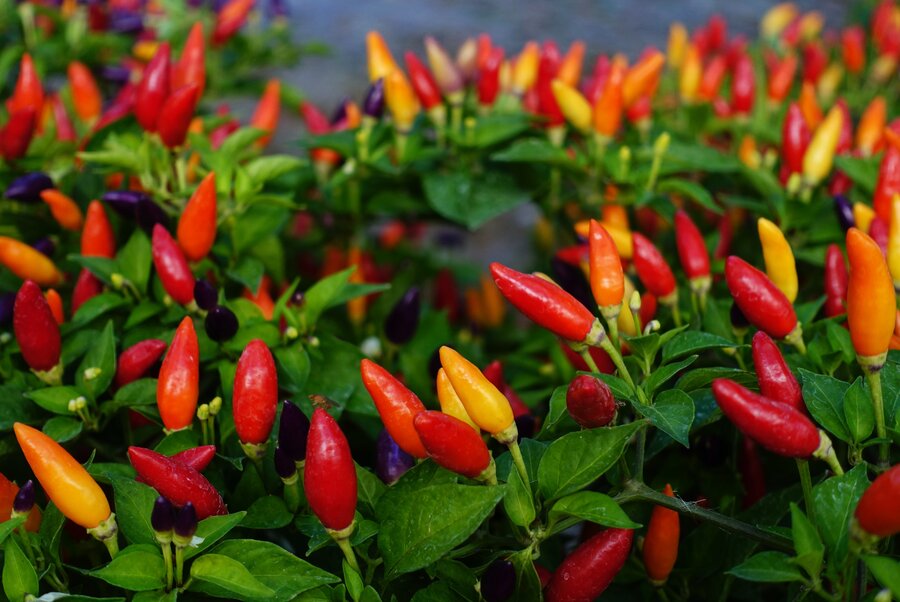
Chillis can be colourful, but they are not necessarily hot.

The Bishop's Crown is my favourite. It is decorative and can easily survive the winter.
Photo: Grøn Kommunikation ©

Your greenhouse can be your own private grocery store.
Photo: Grøn Kommunikation ©